In this tutorial, we are going to create a pure CSS slide out menu with a hamburger button. It is based on a simple idea to push the main content and slide out the menu. Initially, the menu will be behind the scene and it can be toggled (open and close) with a hamburger button.
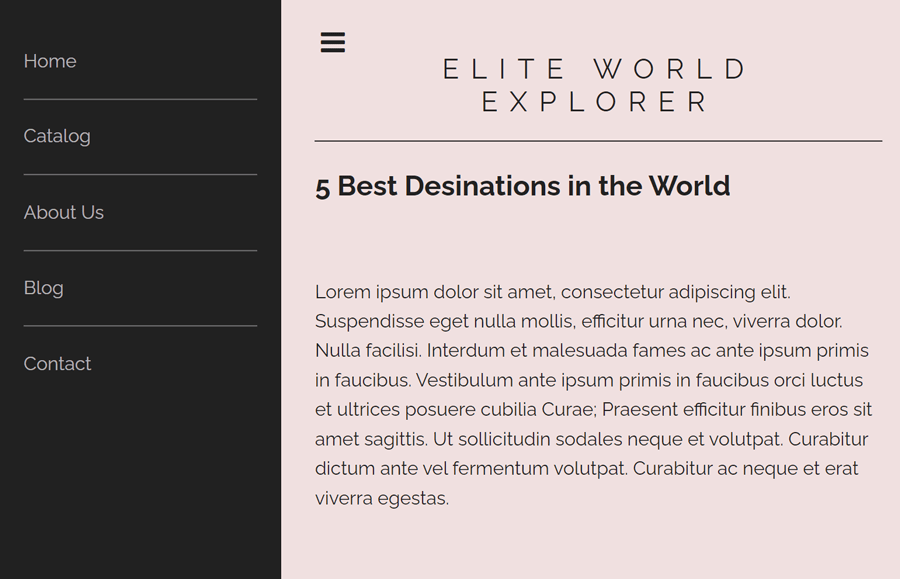
In order to utilize the idea, we’ll use the HTML checkbox to toggle the side menu by detecting the checked and unchecked values. Then we’ll use the CSS properties to style and make the menu functional without using JavaScript. Well! before getting started with coding, check the final output on the demo page to see how the slideout menu works.
Whether you are working on a project or want to learn the technique of a creating pure CSS side navigation menu. This tutorial might be helpful for you. So, let’s get started with HTML code to create a slide-out menu.
HTML Structure for Slide Out Menu
The HTML structure for the slide out menu consists of four parts. The input checkbox, label element for hamburger button, content container, and side navigation for menu links. So, create a checkbox element with id "menu-toggle" and place a label tag just after it with a class name "menu-icon".
Inside the label, place the icon for the hamburger button. Here we are going to use Font Awesome icon for the menu button. If you are already using any other icons library, then you can place your picked icon inside the label tag.
Similarly, create a div element with a class name "content-container" any place your site’s content inside it. You can also use this class name for the main container in your existing project. After the content container, create a div element with the class name "slideout-sidebar" and place an unordered list of links inside it.
In order to get the menu working with the power of pure CSS, make sure the four elements (checkbox, label, content-container, and slideout-sidebar) follows the same sequence as follows:
<input type="checkbox" id="menu-toggle" />
<label for="menu-toggle" class="menu-icon"><i class="fa fa-bars"></i></label>
<div class="content-container">
  <div class="site-title">
    <h1>Elite World Explorer</h1>
  </div>
  <div class="content">
    <h1>5 Best Desinations in the World</h1>
    <img src="https://placehold.it/700x250" alt="" class="" />
    <p>Your content goes here...</p>
  </div>
</div>
<div class="slideout-sidebar">
  <ul>
    <li>Home</li>
    <li>Catalog</li>
    <li>About Us</li>
    <li>Blog</li>
    <li>Contact</li>
  </ul>
</div>
In the above HTML code, you just need to update your navigation links. For demo purposes, I didn’t create hyperlinks. You can create an anchor element inside each li tag.
If you are not using Font Awesome, you can load this icons library by adding the following CDN link into the head tag of your HTML document.
<link rel="stylesheet" href="https://cdnjs.cloudflare.com/ajax/libs/font-awesome/4.7.0/css/font-awesome.min.css">
The CSS Styles for Slide Out Menu
After creating the HTML, now it’s time to style the menu. So, select "content-container" and define its relative position along with the hidden value for the overflow property. This class handles the content area and it’s responsible for push content animation.
.content-container {
  position: relative;
  z-index: 0;
  padding: 20px;
  max-width: 700px;
  margin: 0 auto;
  overflow: hidden;
  transition: all 300ms ease-in-out;
}
Basically, the following CSS defines the style for the typography of the content area. You may not need these styles, but if you want to create the page structure as shown in the demo. Then you can use the following styles for site title, headings, paragraphs and images.
.site-title {
  text-align: center;
  border-bottom: 1px solid #111111;
  margin-bottom: 24px;
}
.site-title h1 {
  font-weight: 300;
  text-transform: uppercase;
  letter-spacing: 10px;
}
img {
  width: 100%;
}
.content p {
  line-height: 1.6em;
  margin-bottom: 24px;
}
Now, the actual part is to start styling slide out menu. So, target the "slideout-sidebar" and define its fixed position. We are going to make it stuck so that our menu still be visible while scrolling the page. Likewise, define the width as 220px, height 100%, and set a background color according to your needs.
As we are going to make the menu slide out, so first, we need to keep the menu behind the scene. To do so, we’ll use the CSS left property with the negative value of the menu width. So, use the left property and define its -250px value. Similarly, define padding property for some spacing around the sidebar items. One thing more, we want to see the slideout animation with a smooth sliding effect. To achieve this, we’ll use the CSS transition property with a 300ms value.
.slideout-sidebar {
  position: fixed;
  top: 0;
  left: -250px;
  z-index: 0;
  width: 220px;
  height: 100%;
  padding: 20px;
  background-color: #212121;
  transition: all 300ms ease-in-out;
}
After that, select the ul element of the slideout-sidebar class. Define the list-style property with the "none" value in order to remove the default bullets listing. We don’t need extra spacing around the navigation items. So, define the 0 value for both margin and padding. Similarly, target the li element and define CSS styles as described below:
.slideout-sidebar ul {
  list-style: none;
  margin: 0;
  padding: 0;
}

.slideout-sidebar ul li {
  cursor: pointer;
  padding: 18px 0;
  border-bottom: 1px solid rgba(244,244,244,0.4);
  color: rgba(244,244,244,0.7);
}

.slideout-sidebar ul li:last-child {
  border-bottom: 0;
}

.slideout-sidebar ul li:hover {
  color: rgba(244,244,244,1);
}
In order to style the hamburger button, first, select the checkbox id "#menu-toggle" and hide it using the display none property. After that, select the "menu-icon" class and specify its absolute position, top, left, font-size, and z-index value as described below.
#menu-toggle {
  display: none;
}

.menu-icon {
  position: absolute;
  top: 18px;
  left: 30px;
  font-size: 24px;
  z-index: 1;
  transition: all 300ms ease-in-out;
}


/*-- The Magic --*/
#menu-toggle:checked ~ .slideout-sidebar {
  left: 0px;
}

#menu-toggle:checked + .menu-icon {
  left: 210px;
}

#menu-toggle:checked ~ .content-container {
  padding-left: 190px;
}
Define the CSS media quires to make the menu responsive. You can style the menu according to the different screen sizes.
/* -- Media Queries -- */

@media (max-width: 991px) {

  .content-container {
    max-width: 480px;
  }

}

@media (max-width: 767px) {

  .content-container {
    max-width: 100%;
    margin: 30px auto 0;
  }
Slide Out Effect
In order to create the slide-out effect for the menu, target the content-container class with the checkbox checked pseudo selector and general sibling combinator "~". Likewise, define the CSS style for the menu links and hamburger button as specified below:
  #menu-toggle:checked ~ .content-container {
    padding-left: 0;
  }

  .slideout-sidebar ul {
    text-align: center;
    max-width: 200px;
    margin: 30px auto 0;
  }

  .menu-icon {
    left: 20px
  }

  #menu-toggle:checked ~ .slideout-sidebar {
    width: 100%;
  }

  #menu-toggle:checked + .menu-icon {
    left: 87%;
    color: #fafafa;
  }

  @media screen
    and (max-width: 736px)
    and (orientation: landscape) {

      .slideout-sidebar {
        padding: 0;
      }

      .slideout-sidebar ul {
        max-width: 100%;
        margin: 60px auto 0;
      }

      .slideout-sidebar ul li {
        display: inline-block;
        border-bottom: 0;
        width: 72px;
        padding: 18px 24px;
        margin: 0 6px 12px;
        color: #ffffff;
        background-color: #777;
      }

  }

}
That’s all! hope you have successfully created slide out menu using pure CSS. If you have any questions or suggestions, let me know by comment below.