In this tutorial, I’m going to create a simple but elegant login form in HTML/ CSS. It has a clean design with minimal markup. You can use it on any CMS website or custom-coding website.
You can easily implement it on your website if you know a little bit about HTML. Generally, you don’t need to be an expert in development.
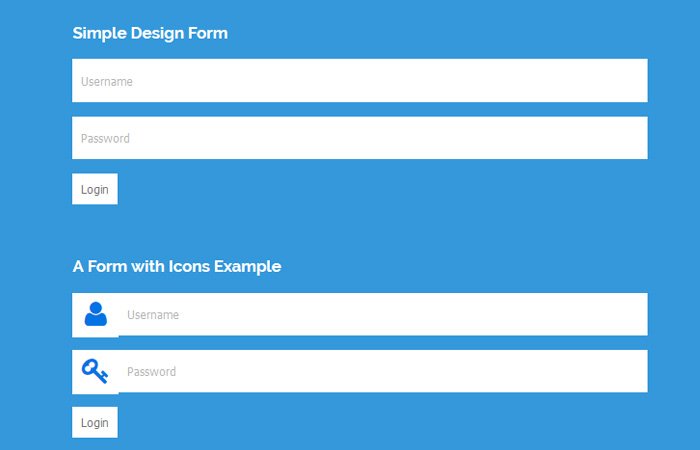
The form included two basic fields username and password. Also, We make two different designs. Both are simple but the second one has icons with each field.
Although, You can add more fields like maybe a password reset by just copying & paste the HTML code. You don’t extra styling for a new field.
Moreover, The form has validations without Javascript. We validate the form fields with HTML5 required element.
This beautiful login form was created by grabbing the code from our previous article called registration form in HTML and have reused the code to create it.
How to Create a Login Form with Plain HTML/CSS
The code of this user login form is very simple and basic. We simply define the input type fields and a submit button and wrap all this inside a wrapper div.
For a simple login example form, We have used the class name simple next to cclogin in the div. We added a heading using the H3 tag.
In order to create a form, We define the form tag and add input fields. All the fields of the forms are inside the P tag. To keep hidden the typing text for the password field, We did set it’s type “password”.
To make the form validate, We simply add a required element. And finally, We added a submit button.
Let’s take a look at the complete source of the form.
<div class="cclogin simple">
    <h3>Simple Design Form</h3>
    <form method="post" action="">
    <p><input type="text" name="Username" value="" required placeholder="Username"></p>
    <p><input type="password" name="password" value="" required placeholder="Password"></p>
    <p><input type="submit" name="Login" value="Login"></p>
  </form>
</div>
CSS Styles for Login Form
Now we will style it. We will set some padding so the fields have four side space inside it. The width is 100% to cover all the space inside the container.
Also, add some height to make the fields look nice.
.cclogin input[type="text"],
.cclogin input[type="password"]{
	padding:10px;
	width:100%;
	border:none;
	height:50px;
	line-height:50px;
	color:#757575;
}
For the submit button, We will apply a background color and font color. Also added a cursor pointer so a small hand shows when the user mouse over the button.
.cclogin input[type="submit"]{
	border:none;
	padding:10px;
	background:#FFFFFF;
	color:#757575;
	cursor:pointer;
}
Adding Icons to Fields:
To add an icon with each field. You need to do two simple things. First, define replace a simple class within the wrapper.
<div class="cclogin icons">
	form fields goes here
</div>
Next, You need to place a span tag with a class cclogin-addon inside the P tag. To add an icon with a field, We are going to use Font Awesome.
<p>
	<span class="cclogin-addon"><i class="fa fa-user fa-2x fa-spin"></i></span>
	<input type="text" name="Username" value="" placeholder="Username">
</p>
Just to fit the icons with each field. We need a little styling for span and input type text and password fields.
.cclogin-addon{
	color:#0473e3;

	float:left;
	padding:9px;
	width:8%;
	background:#FFFFFF;
	text-align:center;
}
.cclogin.icons input[type="text"],
.cclogin.icons input[type="password"] {
	width:92%;
}
.cclogin.icons .half input[type="text"] {
	width:100%;
}
That’s All! Enjoy the Beautiful sign-in form and Leave a comment below and tell us how you customize it and make it look better for your website.