File uploads are a common feature in web applications. They allow users to share documents, images, and other files easily. Bootstrap 4 is a popular framework that simplifies web development, and you can use it to create a user-friendly drag and drop file upload with a choose option. In this blog post, we’ll guide you through the step-by-step process of creating this functionality without using complex jargon.
Step 1: Create the File Input Element
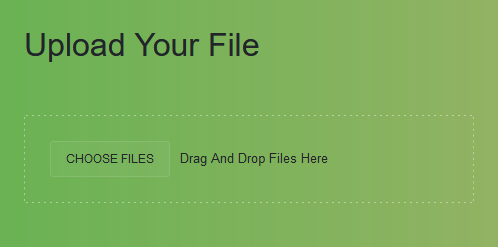
The given HTML code creates a centered file upload interface with a “Choose Files” button, a “Drag And Drop Files Here” message, and the ability to select multiple files.
<div class="container d-flex justify-content-center mt-100">
<div class="row">
<div class="col-md-12">
<h2>Upload Your File </h2><div class="file-drop-area">
<span class="choose-file-button">Choose Files</span>
<span class="file-message">Drag And Drop Files Here</span>
<input class="file-input" type="file" multiple>
</div>
</div>
</div>
</div>
Step 2: Design with Stylish CSS Styles
This CSS code styles a web page by setting a flexbox layout for the body, creating a file upload area with a centered “Choose Files” button and drag-and-drop message, and customizing various design elements, including fonts and colors.
body {
display: flex;
flex-direction: column;
align-items: center;
justify-content: space-between;
background: linear-gradient(to right, #48AA3AE8, #a3b36a);
color: dark grey;
font-family: 'Lato', sans-serif;
}

h2 {
margin: 50px 0;
}
.file-drop-area {
position: relative;
display: flex;
align-items: center;
width: 450px;
max-width: 100%;
padding: 25px;
border: 1px dashed rgba(255, 255, 255, 0.4);
border-radius: 3px;
transition: 0.2s;
}

.choose-file-button {
flex-shrink: 0;
background-color: rgba(255, 255, 255, 0.04);
border: 1px solid rgba(255, 255, 255, 0.1);
border-radius: 3px;
padding: 8px 15px;
margin-right: 10px;
font-size: 12px;
text-transform: uppercase;
}

.file-message {
font-size: small;
font-weight: 300;
line-height: 1.4;
white-space: nowrap;
overflow: hidden;
text-overflow: ellipsis;
}

.file-input {
position: absolute;
left: 0;
top: 0;
height: 100%;
width: 100%;
cursor: pointer;
opacity: 0;
}

.mt-100{
margin-top:100px;
}
Step 3: File Input Display Update with jQuery
This jQuery code attaches an event handler to file input elements. When a user selects files using the input, it dynamically updates a nearby text element to display either the selected file’s name or the count of selected files.
$(document).on('change', '.file-input', function() {
var filesCount = $(this)[0].files.length;
var textbox = $(this).prev();
if (filesCount === 1) {
var fileName = $(this).val().split('\\').pop();
textbox.text(fileName);
} else {
textbox.text(filesCount + ' files selected');
}
});
Step 4: CDNs
https://stackpath.bootstrapcdn.com/bootstrap/4.3.1/css/bootstrap.min.css

https://cdnjs.cloudflare.com/ajax/libs/jquery/3.2.1/jquery.min.js

https://stackpath.bootstrapcdn.com/bootstrap/4.3.1/js/bootstrap.bundle.min.js
A Guide to Creating an Interactive File Upload Interface with Bootstrap 4 Demo
Creating a Bootstrap 4 drag and drop file upload with a choose option is a user-friendly way to allow users to upload files to your web application. By following these steps, you can easily integrate this feature into your project without the need for complex technical jargon.