Today tutorial is about designing registration form in HTML with CSS source code. It is a stylish and attractive looking Signup Form design in CSS that makes your web design outstanding.
The form has a unique look and feel and can be used for any kind of website. It is perfect to use for a custom website where you want to get some important information from the user while registering on your website.
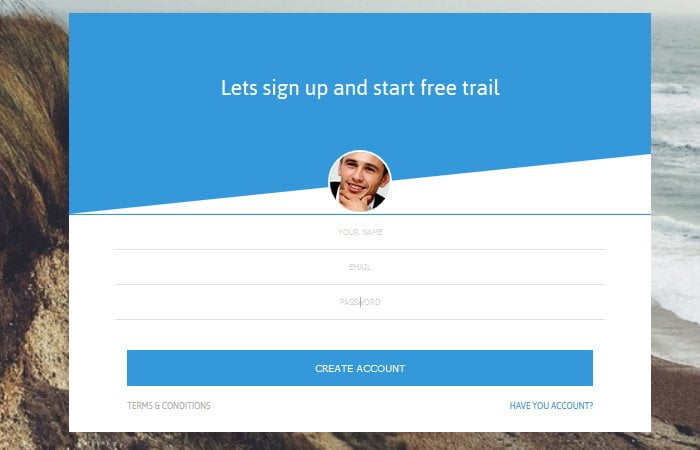
The form has a nice background image and it is a full-screen form with the container. You can remove a container class to decrease its size.
This form comes with a few basic input fields. These are full name, email, and password. But you can easily extend it by just copy & paste HTML structure.
It is noted that We have previously created a beautiful registration form in HTML but here we come up with another design which gives an attractive look.
This HTML registration form has an attractive design that is important for every website. It’s minimal design structure that has the header, few registration fields and creates an account button.
It is full page design and using light color schemes such as Blue and while.
How to Code Registration Form in HTML/CSS
We will start with markup which is simple and straightforward. We define the primary container and then follow up some child divs.
The top header part of form design has included a heading, photo, and SVG. We use SVG to make the header design look better and it will polygon the right area of the header.
<div class="SignUp">
  <div class="heading">
    <h3>Lets sign up and start free trail</h3>
    <img class="portrait" src="path/photo.jpg">
    <svg class="slant" viewBox="0 0 1 1" preserveAspectRatio="none">
      <polygon points="0,1 1,1 1,0">
    </svg>
  </div>
</div>
We just created a few fields, i.e., name, email, and password. Each field has placeholder text that will be gone when the user types in the form field.
<form method="post">
    <input type="text" name="name" placeholder="your name">
    <input type="email" name="email" placeholder="email">
    <input type="password" name="password" placeholder="password">
     <button>Create Account</button>
</form>
The last area of form design is about adding some info. We have added two anchor links for terms & conditions and log-in link.
<div class="info">
<a href="#">Terms & Conditions</a>
<a href="#" class="sign-in-link">Have you account?</a>
</div>The CSS Styling
After coding in HTML, now its time to code styles for registration form in CSS source. In the demo, You can find a full-width background image, so we have designed this our body class. We simply define background image and make its size cover so it will be responsive.
body {
 background: url("../images/bg.jpg");
 background-repeat:no-repeat;
 background-position:center;
 background-size:cover;
 font-family: 'Jaldi', sans-serif;
  font-size: 16px;
}
As I explain you above that, We have defined the primary container, but we make it margin: 0 autos; so it should align the center of the page body.
.container {
  margin: 0 auto;
  position: relative;
  box-sizing: border-box;
}
The child or inner div of the main container called .SignUp which have simple background white color and some padding-bottom of 30px.
.SignUp{
	background:#fff;
	padding-bottom: 30px;
}
To style photo of a person, We used the class name .portrait that has few basic styling e.g., Border, border-radius and set some width and height according to achieve the desired size of the photo.
The important thing here you must remember, You should add position: relative; and z-index: 2; so that picture should not get hide.
.portrait {
  position: relative;
  height: 100px;
  width: 100px;
  margin: 30px auto 0;
  border: 4px solid white;
  border-radius: 54px;
  z-index: 2;
}
Here is CSS that needs to include for SVG to keep the design polygon.
.slant {
  position: absolute;
  left: 0;
  bottom: 0;
  margin-top: -100px;
  width: 100%;
  height: 100px;
  z-index: 1;
}
.slant polygon {
  fill: white;
}
Ok now let’s create the form fields. We have used some border, color, and padding to style them as you can see below.
.SignUp form{
   border-top:solid 1px #3498db;
}
.SignUp input[type="text"],
.SignUp input[type="email"],
.SignUp input[type="password"] {
 -moz-border-bottom-colors: none;
    -moz-border-left-colors: none;
    -moz-border-right-colors: none;
    -moz-border-top-colors: none;
    border-color: -moz-use-text-color -moz-use-text-color #ddd;
    border-image: none;
    border-style: none none solid;
    border-width: medium medium 1px;
    color: #aaa;
    display: block;
    margin: 0 auto;
    padding: 20px;
    text-align: center;
    text-transform: uppercase;
    width: 80%;
}
.SignUp button {
  display: block;
  width: 80%;
  margin: 50px auto 0;
  padding: 20px;
  font-size: 16px;
  text-transform: uppercase;
  color: white;
  border: none;
  background-color: #3498DB;
  cursor: pointer;
}
In the end, We have style bottom info area.
.SignUp .info {
  margin: 20px auto 0;
  display: -webkit-box;
  display: -webkit-flex;
  display: -ms-flexbox;
  display: flex;
  width: 80%;
  -webkit-box-pack: justify;
  -webkit-justify-content: space-between;
      -ms-flex-pack: justify;
          justify-content: space-between;
}
.SignUp .info a {
  text-transform: uppercase;
  text-decoration: none;
  color: #AAA;
}
.SignUp .info a.sign-in-link {
  color: #3498DB;
}
Well, that’s today tutorial about designing user signup form using CSS3 and HTML5. I am sure you love it and find it useful.
You can certainly see your expertise within the work you write.
The world hopes for even more passionate writers such
as you who are not afraid to say how they believe. At all times follow
your heart.
Thanks for your appreciation. Keep visiting us for useful HTML, CSS, and JavaScript code snippets.
This is my first time here and I am truly impressed to read all web design tutorial in one place.
Hi Columbus!
Thanks for your feedback. Keep visiting us for more web design code and scripts.
Hmm is anyone els experiencing problems with the pictures on this
blog loading? I’m trying to figure out if itss a problem on my endd or if it’s the blog.
Any suggestions would be greatly appreciated.
Hello Marquis!
Which problem are you facing? Let us know, we’ll try to solve your issue.
Thanks for your feedback!
Thanks brother good job much money for you!
You’re welcome, bro! Keep visiting us for more HTML, CSS code & scripts.