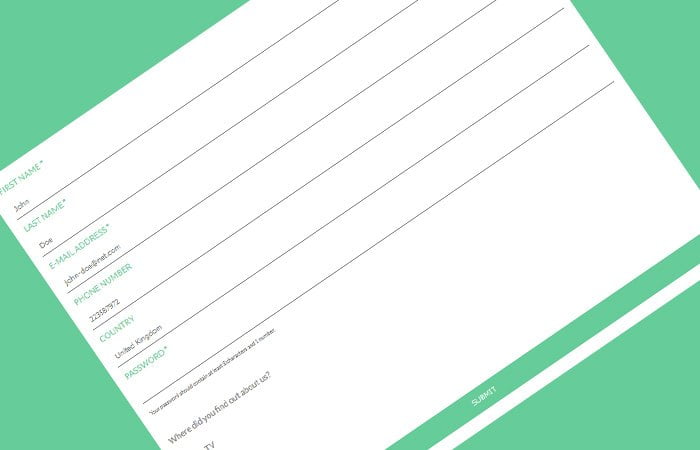
The online signup form helps the user to create an account. This is an HTML code for registration form with validation which easier to add on your website.
The form has a nice looking design with clean coded. It is responsive and built-in with form fields validation. We did design it by using only CSS and plain HTML.
But to make the fields validated, We did use the JavaScript to enhance the validation.
The registration form is one of the most important page on a website which offers service, downloads something, online store and a site with a management system like events classes.
If you want to give access to premium content on your website, You surely need a log in a login area with a form but for this, You also need to implement a registration system.
So after a user successfully registers they can log in as well.
In this document, I will create a simple form using plain HTML and CSS then apply a JavaScript validation. The validation will work when a user hit the submit button.
If a user submits a button without filling the fields, They will able to see a prompt message against each field.
Without going into more details, Let’s start creating it.
Create Code HTML for Registration Form with Validation
The simple and easy way to create the form on your website to add formstyle.css and validation.js then copy & paste HTML code form the index.html file.
But if you want to create it step by step then follow these simple steps:
Let’s start with the container and create a div with class form-container and place all the form fields. To apply nice style on fields, Make sure to add a class registerForm to form tag.
<div class="form-container">
<form name="registerForm">
    <label for="firstName">First Name *</label>
    <input type="text" id="firstName" name="firstName" placeholder="John" required/>
    <label for="lastName">Last Name *</label>
    <input type="text" id="lastName" placeholder="Doe" required/>
</form>
</div>
If you want to add validation error message show with any field, You simply need to add a P tag with a class name error-message.
<div class="form-container">
<form name="registerForm">
    <label for="e-mail">E-mail address *</label>
    <input type="text" id="e-mail" placeholder="[email protected]" required/>
    <p class="error-message"></p>
</form>
</div>
We add a few radio button at the end of the form. If you want to add them, You can add the following code.
<div class="form-container">
    <div class="radio-question">
        <p>Where did you find out about us?</p>
        <input class="radio-input" type="radio" name="media" value="TV" /> TV <br>
        <input class="radio-input" type="radio" name="media" value="radio" /> Radio <br>
         <input class="radio-input" type="radio" name="media" value="internet" /> Internet <br>
         <input class="radio-input" type="radio" name="media" value="newspaper" /> Newspaper <br>
         <input class="radio-input" type="radio" name="media" value="recommend" /> Recommendation <br>
    </div>
</div>
To make work the validation properly, call an onClick function on the submit button.
<div class="form-container">
	<input class="button" type="submit" value="submit" name="submit" onClick="formValidation()" />
</div>
The CSS Style
The above form will not have any style and look bad. Let’s make it nice and beautiful by starting with applying CSS on the container.
.form-container {
  text-align: left;
  background: white;
  justify-content: center;
  padding: 20px;
}
Let’s make label element little batter.
label {
  color:  #66cc99;
  text-transform: uppercase;
}
Make input filed awesome with these few lines of CSS.
input {
  background: transparent;
  font-size: 14px;
  display: block;
  padding: 10px 30px 10px 5px;
  margin: 10px 0 40px;
  border: 2px solid white;
  border-bottom: 2px solid grey;
  width:100%;
}
input:focus {
  outline: none;
  border-bottom: 2px solid #66cc99;;
}
We have a few radio input type as well so let’s align them properly.
.radio-question input {
  margin: 10px;
  padding: 0;
}
.radio-input {
  display: inline;
  width:25px;
}
How we can leave a submit button as it is?
.button {
  background: #66cc99;
  border: 0;
  padding: 15px 30px;
  margin-top: 20px;
  color: white;
  text-transform: uppercase;
  font-size: 13px;
}
.button:hover {
  background: #5ec190;
}
And finally, What you think about the styling error message? Just add this piece of code.
.error-message {
  color: red;
  margin-top: -30px;
  margin-bottom: 20px;
  font-size: 12px;
}
The JavaScript
We will create a JavaScript function formValidation which will validate each input field whether it’s checked or not before passing the value to the database.
We have created a separate file validation.js for validation which you can include in the document.
Just to mention here, Each input type field has its own function. You can refer to the file for all the function and have a look at the function for the input type text field.
/*first name input validation*/
function FirstName(fname) {
  var message = document.getElementsByClassName("error-message");
  var letters = /^[A-Za-z]+$/;
  if ( fname =="" || fname.match(letters)) {
    text="";
    message[0].innerHTML = text;
    return true;
  }
  else {
    text="First name should contain only letters";
    message[0].innerHTML = text;
    return false;
  }
}