A calendar widget is the most important component for events-related websites. It helps users to see schedule or event information for a specific day or date. Besides this, a calendar is also used in the date picker, event scheduler, or general-purpose calendar widget projects. If you are working on such a project in which you need to implement a calendar widget, you are in the right place. In this tutorial, I’m going to explain how to create a calendar in HTML, CSS, and JavaScript.
You definitely need a calendar that you can design according to your needs. So, I’ll focus on the customization as well as creating the calendar widget by adding its assets to your project. Basically, this calendar widget doesn’t require a library or plugin as it’s purely written in JavaScript. Anyhow, it uses Font Awesome CSS for calendar navigation keys.
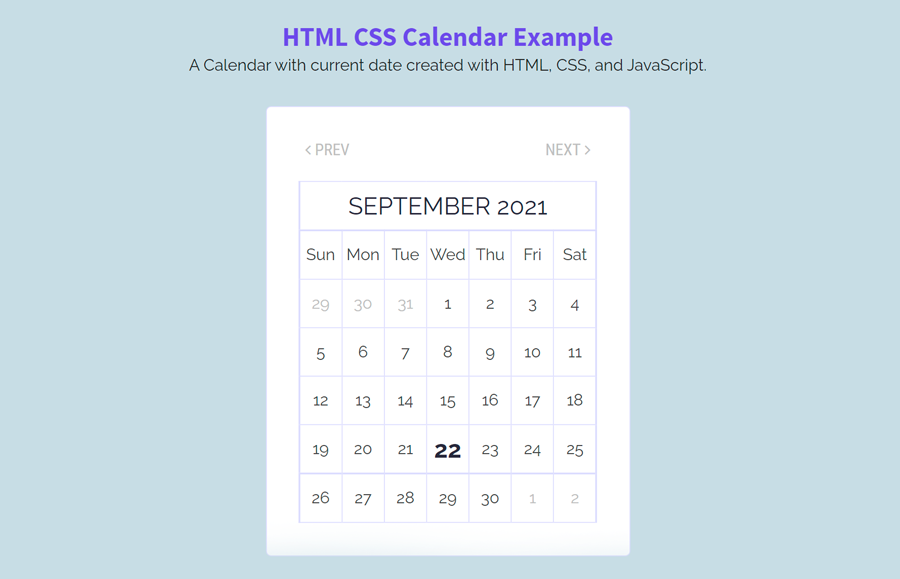
Before getting started with HTML, I would suggest you check out the demo page to see how the calendar works. You can highly customize its layout, current date, disabled date, and next/prev buttons navigation as you want.
The HTML Structure
In HTML, load the Reset CSS in order to clear the default browser’s formatting of HTML elements. Similarly, load Roboto fonts and Font Awesome CSS (for icons) by adding the following CDN links into the head tag of your webpage.
<!-- Reset CSS -->
<link rel="stylesheet" href="https://cdnjs.cloudflare.com/ajax/libs/meyer-reset/2.0/reset.min.css">
<!-- Google Roboto Fonts -->
<link rel='stylesheet' href='https://fonts.googleapis.com/css?family=Roboto:400|Roboto+Condensed:400|Fjalla+One:400'>
<!-- Font Awesome CSS -->
<link rel='stylesheet' href='https://maxcdn.bootstrapcdn.com/font-awesome/4.2.0/css/font-awesome.min.css'>
We need to have a div element in which the calendar will be rendered dynamically. So, create a div element with a class name "calendar-wrapper", place next/prev buttons, and a div element with an id "divCal" inside it.
<div class="calendar-wrapper">
    <button id="btnPrev" type="button">Prev</button>
    <button id="btnNext" type="button">Next</button>
<div id="divCal"></div>
</div>
You can place the above HTML structure anywhere in your webpage/app where you want to create a calendar widget.
Create CSS Styles for Calendar
After creating the calendar wrapper in HTML, now it’s time to style the calendar layout. Therefore, select the "calendar-wrapper" class and define its width, margin, padding, and border properties as follows. You can set the custom background color according to your choice.
.calendar-wrapper {
  width: 360px;
  margin: 3em auto;
  padding: 2em;
  border: 1px solid #dcdcff;
  border-radius: 5px;
  background: #fff;
}
The calendar function generates dates arranged in a table layout. So, you can easily customize the calendar layout by selecting the table element of the calendar wrapper. The following are the default style (as shown on the demo page). You can modify them according to your needs.
.calendar-wrapper table {
  clear: both;
  width: 100%;
  border: 1px solid #dcdcff;
  border-radius: 3px;
  border-collapse: collapse;
  color: #444;
}
.calendar-wrapper td {
  height: 48px;
  text-align: center;
  vertical-align: middle;
  border-right: 1px solid #dcdcff;
  border-top: 1px solid #dcdcff;
  width: 14.28571429%;
}
thead td {
  border: none;
  color: #28283b;
  text-transform: uppercase;
  font-size: 1.5em;
}
The "not-current" class for the td element specifies the disabled dates in the calendar. If you want to hide these dates, you can use the CSS visibility property with a “hidden” value.
td.not-current {
  color: #c0c0c0;
}
If you want to customize the current date, you can select the "today" class and define CSS styles for it. The default CSS styles for the current date are as follows:
td.today {
  font-weight: 700;
  color: #28283b;
  font-size: 1.5em;
}
The calendar uses Font Awesome icon inside the next and previous buttons. These calendar navigation buttons can be customized by selecting them by their id. You can set the custom background color, font size, and icon for these buttons according to your needs.
#btnPrev {
  float: left;
  margin-bottom: 20px;
}
#btnPrev:before {
  content: '\f104';
  font-family: FontAwesome;
  padding-right: 4px;
}
#btnNext {
  float: right;
  margin-bottom: 20px;
}
#btnNext:after {
  content: '\f105';
  font-family: FontAwesome;
  padding-left: 4px;
}
#btnPrev,
#btnNext {
  background: transparent;
  border: none;
  outline: none;
  font-size: 1em;
  color: #c0c0c0;
  cursor: pointer;
  font-family: "Roboto Condensed", sans-serif;
  text-transform: uppercase;
  transition: all 0.3s ease;
}
Similarly, you can define the hover style for the next/prev buttons as follows. If you want to make these buttons more attractive, check out these CSS hover effects for buttons.
#btnPrev:hover,
#btnNext:hover {
  color: #28283b;
  font-weight: bold;
}
The JavaScript Function
Now everything is ready, finally, you only need to add the calendar JavaScript function into your project. So, add the following function between <script> tag before closing the body tag.
If you need to add more functionality to it you can modify the code accordingly. The purpose of each variable, object, and function is commented, so you can easily understand what the calendar function does.
var Cal = function(divId) {
  //Store div id
  this.divId = divId;
  // Days of week, starting on Sunday
  this.DaysOfWeek = [
    'Sun',
    'Mon',
    'Tue',
    'Wed',
    'Thu',
    'Fri',
    'Sat'
  ];
  // Months, stating on January
  this.Months = ['January', 'February', 'March', 'April', 'May', 'June', 'July', 'August', 'September', 'October', 'November', 'December' ];
  // Set the current month, year
  var d = new Date();
  this.currMonth = d.getMonth();
  this.currYear = d.getFullYear();
  this.currDay = d.getDate();

};
// Goes to next month
Cal.prototype.nextMonth = function() {
  if ( this.currMonth == 11 ) {
    this.currMonth = 0;
    this.currYear = this.currYear + 1;
  }
  else {
    this.currMonth = this.currMonth + 1;
  }
  this.showcurr();
};
// Goes to previous month
Cal.prototype.previousMonth = function() {
  if ( this.currMonth == 0 ) {
    this.currMonth = 11;
    this.currYear = this.currYear - 1;
  }
  else {
    this.currMonth = this.currMonth - 1;
  }
  this.showcurr();
};
// Show current month
Cal.prototype.showcurr = function() {
  this.showMonth(this.currYear, this.currMonth);
};
// Show month (year, month)
Cal.prototype.showMonth = function(y, m) {
  var d = new Date()
  // First day of the week in the selected month
  , firstDayOfMonth = new Date(y, m, 1).getDay()
  // Last day of the selected month
  , lastDateOfMonth =  new Date(y, m+1, 0).getDate()
  // Last day of the previous month
  , lastDayOfLastMonth = m == 0 ? new Date(y-1, 11, 0).getDate() : new Date(y, m, 0).getDate();
  var html = '<table>';
  // Write selected month and year
  html += '<thead><tr>';
  html += '<td colspan="7">' + this.Months[m] + ' ' + y + '</td>';
  html += '</tr></thead>';
  // Write the header of the days of the week
  html += '<tr class="days">';
  for(var i=0; i < this.DaysOfWeek.length;i++) {
    html += '<td>' + this.DaysOfWeek[i] + '</td>';
  }
  html += '</tr>';

  // Write the days
  var i=1;
  do {
    var dow = new Date(y, m, i).getDay();
    // If Sunday, start new row
    if ( dow == 0 ) {
      html += '<tr>';
    }
    // If not Sunday but first day of the month
    // it will write the last days from the previous month
    else if ( i == 1 ) {
      html += '<tr>';
      var k = lastDayOfLastMonth - firstDayOfMonth+1;
      for(var j=0; j < firstDayOfMonth; j++) {
        html += '<td class="not-current">' + k + '</td>';
        k++;
      }
    }
    // Write the current day in the loop
    var chk = new Date();
    var chkY = chk.getFullYear();
    var chkM = chk.getMonth();
    if (chkY == this.currYear && chkM == this.currMonth && i == this.currDay) {
      html += '<td class="today">' + i + '</td>';
    } else {
      html += '<td class="normal">' + i + '</td>';
    }
    // If Saturday, closes the row
    if ( dow == 6 ) {
      html += '</tr>';
    }
    // If not Saturday, but last day of the selected month
    // it will write the next few days from the next month
    else if ( i == lastDateOfMonth ) {
      var k=1;
      for(dow; dow < 6; dow++) {
        html += '<td class="not-current">' + k + '</td>';
        k++;
      }
    }
    i++;
  }while(i <= lastDateOfMonth);
  // Closes table
  html += '</table>';
  // Write HTML to the div
  document.getElementById(this.divId).innerHTML = html;
};
// On Load of the window
window.onload = function() {
  // Start calendar
  var c = new Cal("divCal");
  c.showcurr();
  // Bind next and previous button clicks
  getId('btnNext').onclick = function() {
    c.nextMonth();
  };
  getId('btnPrev').onclick = function() {
    c.previousMonth();
  };
}
// Get element by id
function getId(id) {
  return document.getElementById(id);
}
That’s all! I hope you have successfully learned how to create an HTML, CSS, JS calendar widget. If you have any questions or suggestions, let me know by comment below.
Very easy guide to learning, how to create a calendar using HTML/CSS.
Thanks for sharing!
Great to hear Sowjanya it help you with creating calendar.